Building a smart gas sensor for your home is an easy and fun project, which can also help to prevent serious damage.
The gas plumbing in my house is rather old, and even though it is checked regularly by professionals from the gas company when they come to replace the gas tanks, I still want to make sure that there is no gas leakage in between.
Buy the full Arduino code and PHP script here
I wanted to build a reliable component, for extra reassurance, that everything is fine, and there is no hazardous gas leakage when I’m out or even when I’m in my house. Obviously, the component I had in mind is an Arduino controller with some kind of a sensor. Few searches online came with the best sensor for my needs, the MQ2 gas sensor: it’s Arduino compatible, it’s reliable and it’s cheap.
When adding a component to our house that has a key or crucial job, we have to make sure that we can count on it. I previously wrote Monitor your online devices (Make sure they’re working as expected) exactly for situations like these.
Some key points that I implement when adding a gas sensor (or a similar sensor with high importance) to my home is:
- send a heartbeat every few minutes to a server that is not situated on our home network, it’s recommended to send the reading from the MQ2 sensor with the heartbeat.
- check the device heartbeats with an external process, and if it detects that those stopped arriving, send mail (you can read more about sending mail with ESP8266)
- If the sensor picks up a rise in gas levels, even if between heartbeats, send an email immediately.
What do we need for this project?
- ESP8266 development board
- MQ2 Sensor
- Soldering wire and jumper wires.
- Some code.
Connecting ESP8266 and MQ2
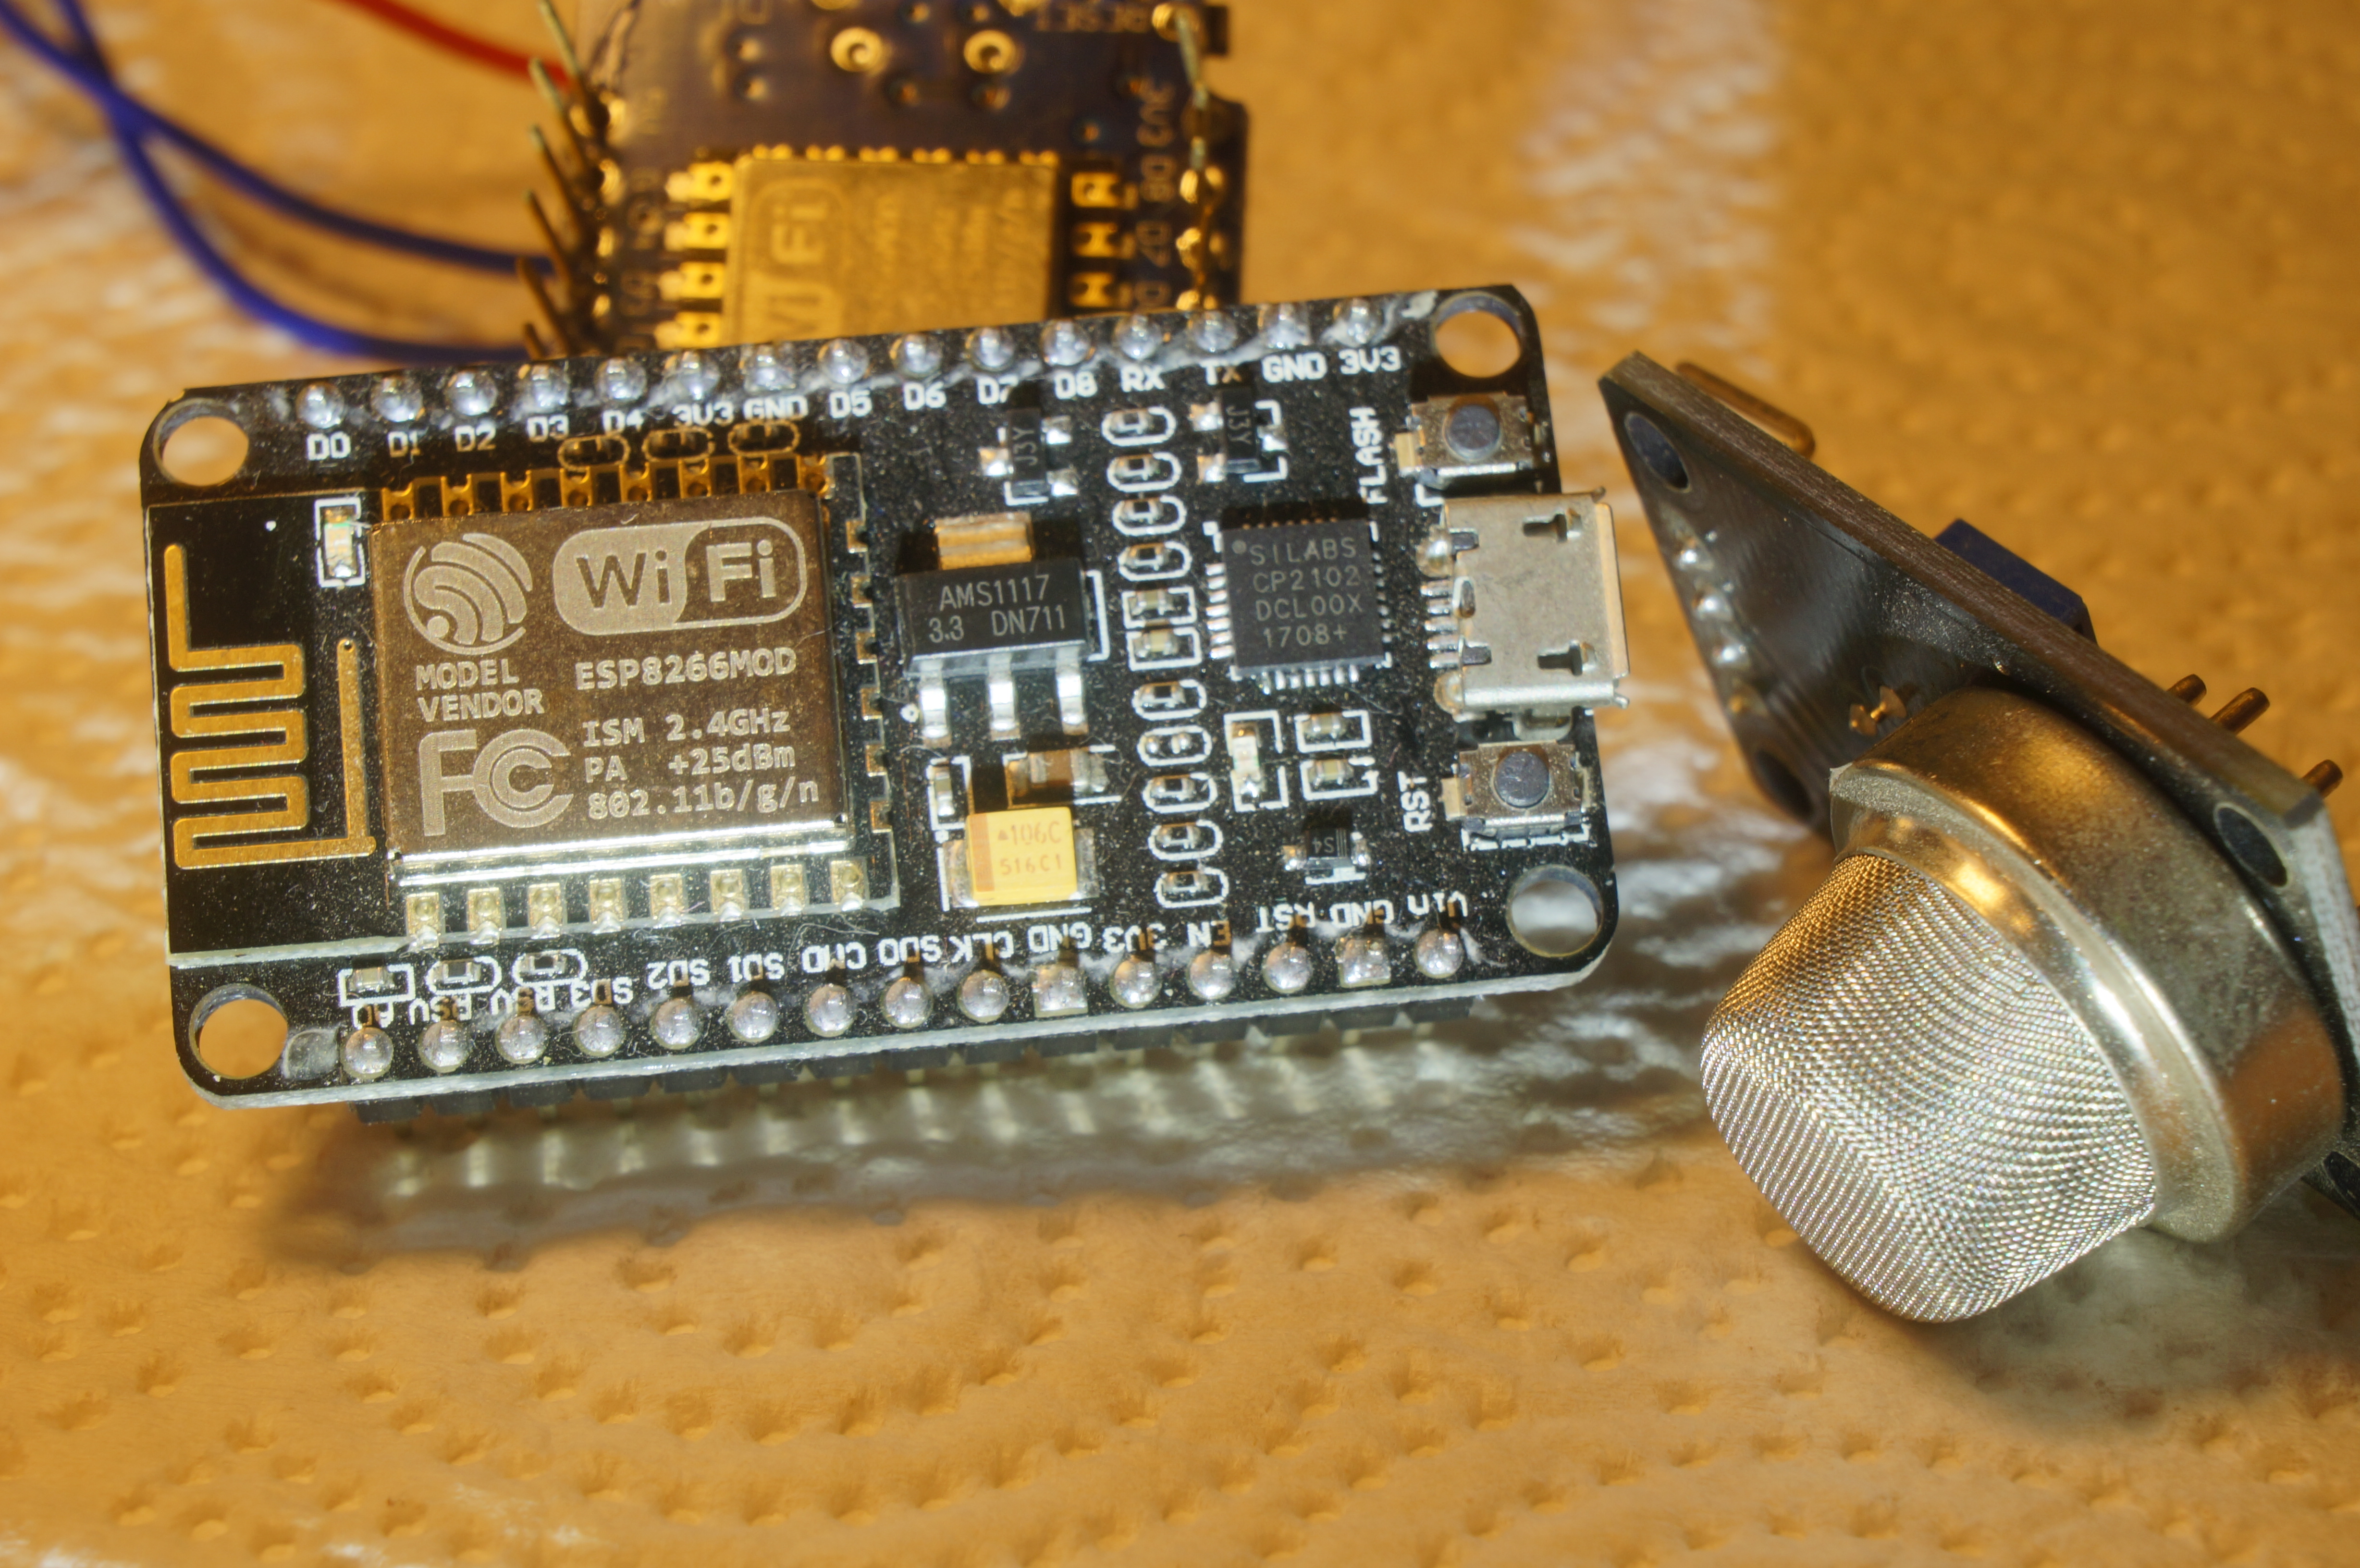
Gas sensor MQ2 with ESP8266
This step requires some soldering. On the MQ2 sensor there are 4 connectors (pins):
- VCC in – 5V AC input
- AOUT- Analog out pin – this is the pin I use for this sensor – it connects to the Analog pin on the ESP8266 – usually there is just one on the development board.
- DOUT- Digital out pin – for a binary state of the sensor, does it detects gas or not. the level for the digital pin is set by a controller on the back of the sensor.
- GND – ground for the power.
It’s possible to connect the VCC(5v) to one of the power pins available on the ESP8266 board. The same goes for the ground pin. The board itself can be powered with a micro-USB cable, and since we’re doing a home project, we can leave it like this.
Arduino Code for the smart gas sensor
In the loop part of our sketch, we’ll do a code that checks for the gas levels and if they are higher than a value (we’ll talk about it later in the article) we’ll send an email. The function hb(); is responsible for sending the mail if there are readings higher than what we expect. This loop handles the case which we already sent mail in the previous iteration and delays the next gas level check with a few minutes.
|
1 2 3 4 5 6 7 8 9 10 11 12 13 14 15 16 17 18 19 20 21 22 23 24 25 26 27 28 |
if (currentMillis - previousMillisHB >= intervalHB * 1000) { previousMillisHB = currentMillis; if (isConnected == 2){ Serial.println("hb"); Serial.print ("Gas level: "); Serial.print (" "); Serial.println (analogRead(A0)); delay(3); heartbeat(); } } long diff = currentMillis - previousMillisWarning; if (currentMillis + intervalWarning >= previousMillisWarning) { previousMillisWarning = currentMillis; if (isConnected == 2){ long ar = analogRead(A0); delay(3); if (ar > 500){ heartbeat(); Serial.print ("Gas level: "); Serial.print (" "); Serial.println (analogRead(A0)); long next = 1 * 60 * 1000 ; previousMillisWarning = previousMillisWarning + next; } } } |
The heartbeat function:
|
1 2 3 4 5 6 7 8 9 10 11 12 13 14 15 16 17 |
void heartbeat(){ HTTPClient http; http.begin("http://someserver/smarthome/gas-heartbeat.php?id=1&value=" + String(analogRead(A0))); //HTTP digitalWrite ( led, 1 ); int httpCode = http.GET(); Serial.print("Staring request\n"); if(httpCode > 0) { if(httpCode == HTTP_CODE_OK) { Serial.println("Success hb"); } } else { Serial.printf("Fault in hb: %s\n", http.errorToString(httpCode).c_str()); } http.end(); digitalWrite ( led, 0 ); } |
we need to initialize the variables in the beginning for the sketch:
|
1 2 3 4 5 6 |
unsigned long previousMillis = 0; unsigned long previousMillisHB = 0; unsigned long previousMillisWarning = 0; const long intervalHB = 300; const long intervalWarning = 10000; |
Read data from Analog pin disconnects from WIFI networks on ESP8266?
Like you noticed, after the analogRead(A0) command, there is a delay for 3 milliseconds, this is because reading from the Analog pin takes time, and if is not handled in the code with delay, causes the device to hang, and disconnect from the network.
Function analogRead() values and how to determine the right one?
This is covered a lot on the internet but i wanted to point out a few things: first of all, not all the sensors are the same, some give higher values, and some lower, so my tip for that is to measure the level of the specific sensor you’re working with and pick the value based on it (3 times the clean air read is a good estimate, I think), second is that you don’t really need to calculate the ppm for this kind of application, in my opinion, this kind of sensor should be indicative, and not precise. It should alert you that something is wrong. Knowing the right ppm of the gas in the air is nice, but probably useless, so you can read directly from the sensor and use it as a measure.
Hope you liked this post, let me know if you have any ideas for improvements.
maya.kimhi